How To Hang Art & Décor On A Curved Wall
So many of you have loved our staircase decorated for Christmas this year, thank you! I must admit I am equally in love and look forward to this tradition every year! Curved walls can make for a complicated and tricky project, so I wanted to share my hack and how I was able to hang canvases on our wall. It’s a quick and easy install that anyone can do. Don’t let your staircase intimidate you any more. You will learn how to hang art & décor on a curved wall if you follow this simple DIY.

The most common questions I have received are, “How do you hang the canvas on the wall? Are the canvases curved also? What do you do with all the holes in the wall when you take them down?” I want to show you step by step, so you can too hang art on your wall without the worry over the complicated curve. This is my 3rd year hanging these on the wall, and I feel like I learn a new trick every year. This year hanging them was a breeze, and I am confident you can handle this simple task too.
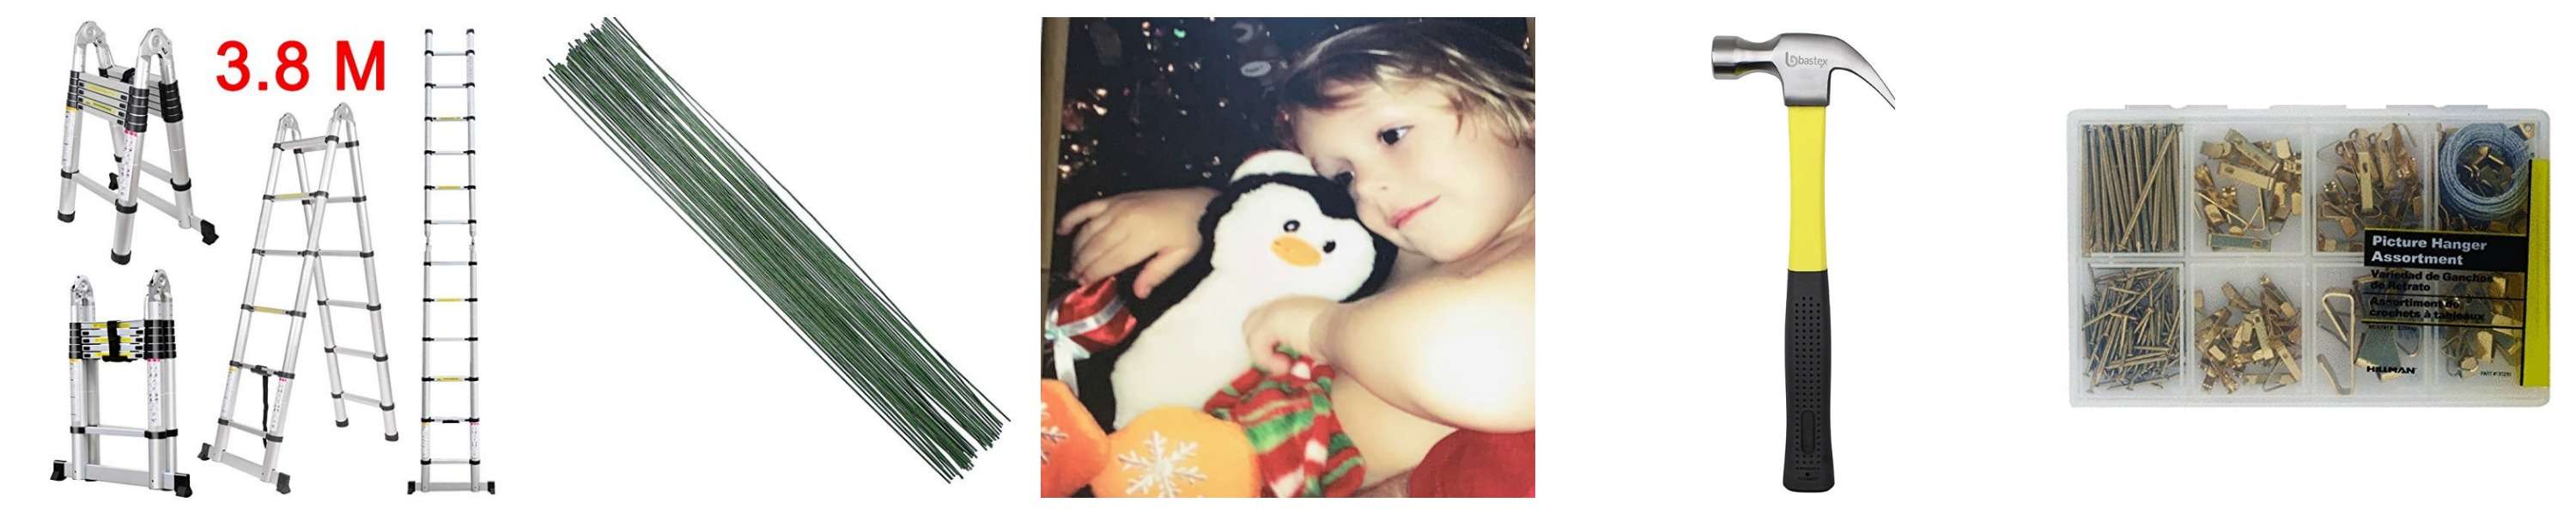
First things first, get your materials ready. I used the following items:


Plan
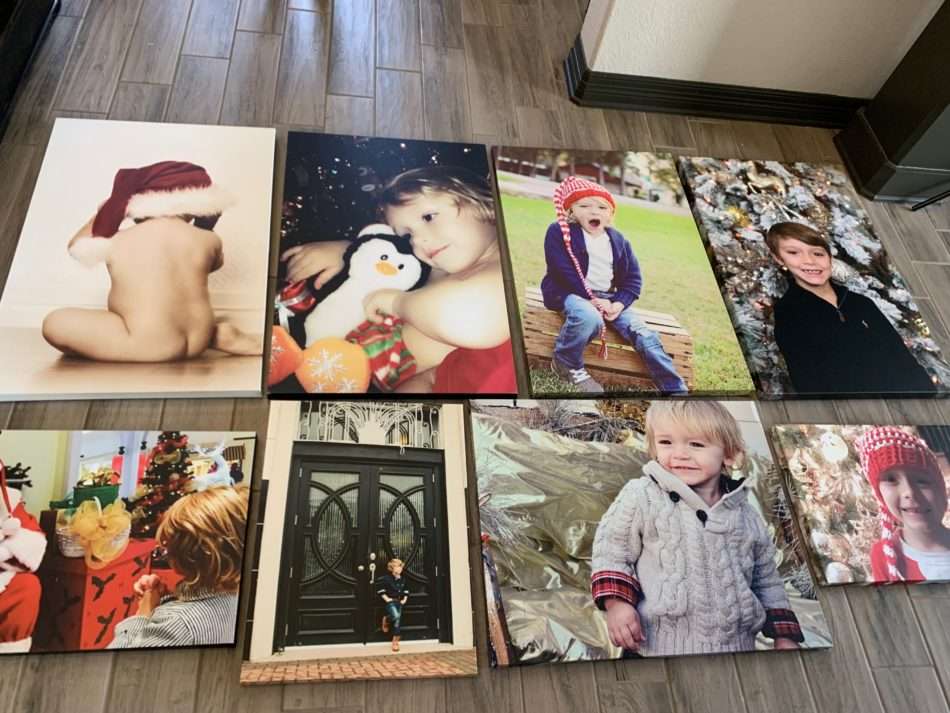
Before attempting to hang your pictures/art on the wall, be sure to graph this out on paper (to scale) with the measurements of the wall. I promise you don’t want to skip this step. This will save you time, frustration, and those extra holes you don’t want to fix later. Simply measure the wall space and each canvas then sketch them out on paper into the layout you come up with. Lay the canvases out on the floor to create the design, then sketch, confirm the original plan fits accordingly, and then you are ready to install. When measuring and planning out the area, be sure to consider the max height you can reach with your ladder. You don’t want to run into that problem once you start hanging the décor.
Install
Installing art or décor on the curved stair wall is doable if you follow these simple steps. I have divided the install into separate portions to keep this nice and simple for you.
Ladder
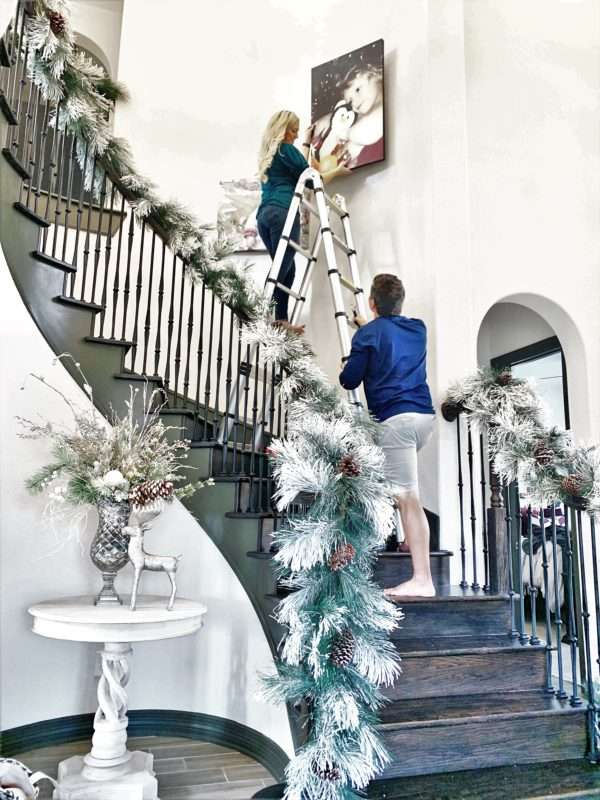
Your ladder can make all the difference if you’re hanging on a wall with high ceilings or hard to reach areas. To make hanging a bit easier, we use a multi-function ladder that is designed to work well on stairs. This will save your life (possibly literally) and make this DIY so much more attainable. Our ladder can be used as an A-frame ladder or an extension ladder, but my favorite feature is the option to adjust the height so that it sits evenly on a staircase. Set your ladder up and get ready for your next move but it is not time to get on the ladder yet, patience my friend. Have it set up and ready to use.

Prepare
Most of the canvases came with the standard picture hanger (the metal bracket) which don’t work well on a curved wall. To accommodate, I added the wire (mentioned above) and secured it tightly to the hanger. Make sure the wire doesn’t hang higher than the top of the canvas before securing it to the back. You will see the wire if you aren’t meticulous with this step. I simply twisted the wire around the bracket a few times until it was tightly secured leaving a small loop for hanging at the top, just below the edge. This allows you to secure the wire to the nail on a curve when it is time to hang (and it is almost time!). I also chose nails that are a bit longer than a standard picture nail. How’s that for an easy hack? Make sure to complete this step for every canvas before stepping foot on that ladder.

When hanging this on a deep curve simply tilt the bracket back much more than you normally would so that the wire can reach the nail
Hang
Finally, you can move to the exciting portion of the install, hanging the art! Be prepared before stepping onto the ladder. Have the necessary materials in hand (maybe even use a work belt) and someone who can stand at the base of the ladder just as a safety precaution. The ladder felt stable as I used it, but Nick (my sexy, little hubs) stayed at the base to make sure we didn’t have any mishaps. Use your measurements and make sure to know where to hang each picture before starting with that hammer.
Materials to have on hand
1. Hammer
2. Nails
3. Level
4. Canvas (Nick handed these to me as I was ready)
I started with the middle, bottom canvas. I am flexible by nature and knew that I could, most efficiently and evenly, rearrange the pictures if necessary, as long as my middle canvas was centered on the wall and at the correct height. I am so glad I did this because after I hung a couple of pieces, I decided to change the layout. This, my friends, is why I told you not to skip step 1. Go back up and reread that portion if you need to. Continue, hammer, nail, then hang. Repeat. After each canvas is attached to the wall, I used my level to make sure the canvas we perfectly level before hanging the next. Don’t let your eye fool you, level it out. This step is a must too; it will save you lots of trouble.
Enjoy!
FYI: My stair wall decor is temporary (seasonal), so I do make sure to treat the wall when I remove the canvases in January. I merely take the picture down, remove the nail, fill the hole with spackling, then touch up with paint. My work here is done.

Shop The Foyer
Be sure to check out my Christmas home tour! I hope you learned from this tutorial and I have answered all the questions regarding decorating your stair wall. Thanks for reading!
YOUR COMMENT